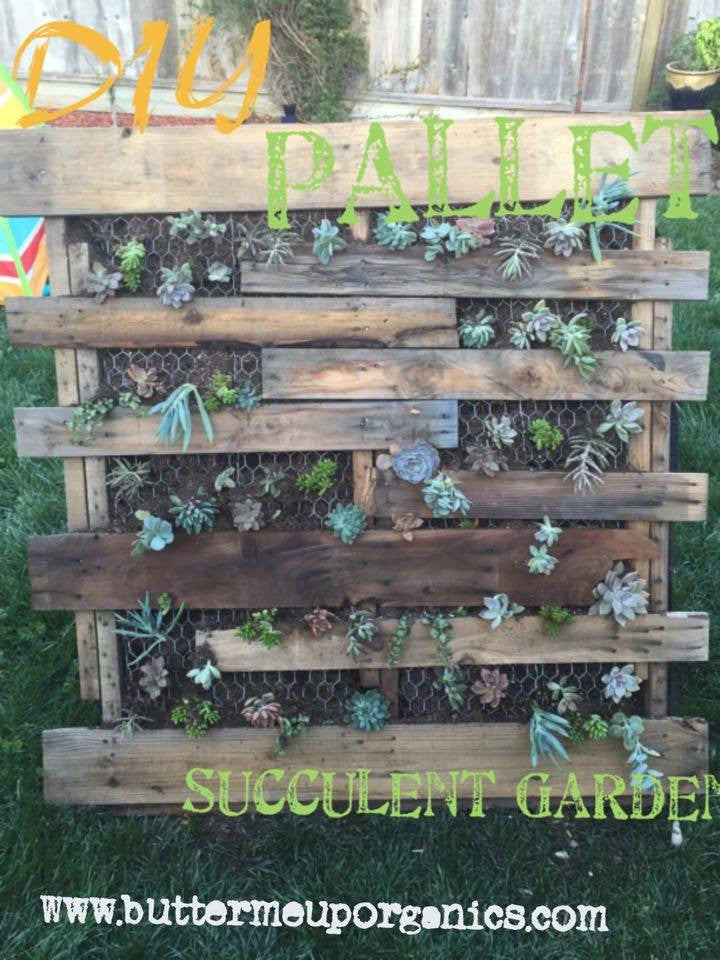
- I was surprised at how easy this project was and how much I fell in love with the finished product. I have wanted a wall succulent garden since I first saw one at a cute restaurant years ago but either never had the vision or the place to put it. We had our lawn put in last summer and the gardeners left two pallets on our side yard. My husband was so annoyed that they purposely went all the way around the house to stash their "trash" but the DIYer in me was ecstatic. I've had many plans for these pallets but when we saw another beautiful succulent garden again the other day, I knew. Our pallets didn't have any back on them and I found that was easier for this project and I added one after. If you have one with a back, I would temporarily remove the back boards and re-affix them afterwards.
Things you will need:
- Pallet
- Chicken Wire
- Wire Cutters
- Staple Gun
- LOTS of Staples
- Weed Guard Landscaping Fabric
- Extra Boards if your pallet doesn't have a back
- Saw to cut the boards
- Nails
- Hammer
- Soil (approx. 8 cubic yards)
- Succulents
- Gloves
- Scissors

It's best to work fairly close to where you plan on putting this because it will be VERY heavy. Turn your pallet upside down and affix the chicken wire to each side with staples. Make sure your chicken wire is straight and even and be careful, that stuff is sharp! I bent the ends in on themselves on the top and bottom so no sharp ends were exposed.

I forgot to take a better picture, but now you add boards to the back so that you can hang and keep the fabric on so that your soil won't all sag out the back. I used boards I already had lying around the yard and put one on the top, middle and very bottom. This board is important so that your soil won't fall out the bottom. If you've removed your boards use the lowest one on the bottom instead, capping in the dirt that would otherwise break the bottom of your fabric.

Now add your fabric backing. I folded it over twice. You'll need two portions, I started with the top half so that when I add soil, it won't get stuck in the second layer of fabric. Leave the top open. That may make more sense in a minute. Staple, staple, staple! Now go back and do the second piece and again, staple, staple, staple! The entire back should be covered. I adhered it to the "walls" of the pallet, not the front boards.


Now it's time to add your soil. Prop up your pallet, this makes it all much easier. I did it on top of the grass so as not to create a soil mess (Husband's suggestion as I make a mess doing just about anything. My mother-in-law can attest to that). I added some soil and then did a few plants, added some soil, etc. I think for some of the roots, it's easier when there's no soil in there, while others, it was easier with it.

I got the larger clusters of succulents from Lowe's. They were $3.98/ea, but if I had gotten clippings from neighbors, this project would have been significantly cheaper. I picked which one I wanted to start with and broke them apart over the soil bag.

Find where you want it to go then gently push in the roots and position the plant how you'd like it. If there's no soil in that spot, you'll be able to re-position after you fill it.

Continue on, I recommend balancing the plants and not clustering them, but, hey, this is your project, it can be whatever you want it to be. I paid special attention to any imperfections in the pallet filling holes with tiny succulents and I bought a large bloom to highlight the broken board. Gives it more personality in my opinion :p

After things start filling in it will really take on it's personality. I went back and exchanged some of the really green ones for more purple and pinkish ones. I realized I bought to many hangy ones and not enough flush ones.

It's coming together!!! Fill with dirt and reposition flowers as needed. You're almost done! Add desired amount of succulents knowing that they'll grow and spread over time so leave blank spaces.
Aaaannnndddd voila!

I really enjoyed this project. All in all, it took a few hours. I have yet to put it on the wall and I think I'll line the back with plastic if I do that. Right now it's leaned up against our patio wall and looks awesome.
Hope you enjoyed this project, I sure did!

